Monday, June 30, 2008

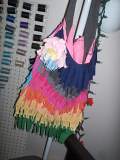
Last minute tee inspiration

Thursday, June 26, 2008

Buckets

Let's go off theme for a second.
This technically isn't a purse, but I can envision possibilities.
Add a strap?
Shoot, just use it to store you purses.
All I know is that it's cute, and Jodie of Ric Rac has posted a tutorial.
(thank you, Wendy, for linking)

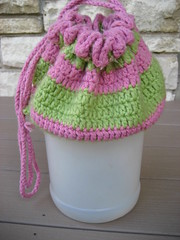
Speaking of buckets, containers, and totes, here's a fun recycling project: a bag over a bleach bottle
Bag made over a bleach bottle
From Aleene's Creating with Plastic Bottles booklet, 1966

It used to be in vogue to crochet a top portion over a bleach bottle base (see the little green purse)
Crocheted Bags Pattens
like in this leaflet of patterns for crocheted bags, from Coats & Clark, 1973

MineFull has posted a tutorial for her version


Here's a similar one by Dottyral
She says, "I just punched holes around the plastic bottle. Did a row of single crochets through the holes, then a bunch of double crochet rounds. Put the drawstring through it. That's it. I wish I had cut the bottle down shorter. I think it would have been cuter."

This one also uses a bleach bottle, but is made from cutting shapes from the bottle, punching holes in the edges, then stitching the shapes together.
bleach bottle purse instructions 2
Posted by Compact Collection, I do not know the year this was published nor it's source (though the name Betty Russell is printed on the page).


crochet cradle purse
Originally uploaded by wendycohoon
Wendycohoon crochets over a vinegar bottle base.

Labels: , , , ,

Saturday, June 21, 2008

Using loom squares

I posted recently about making your own loops (from t-shirts) for a handheld loom, and here are some examples of what you can make
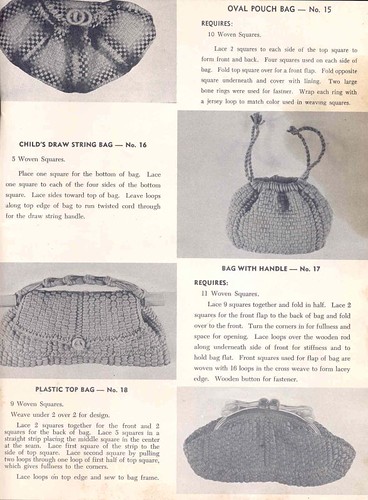
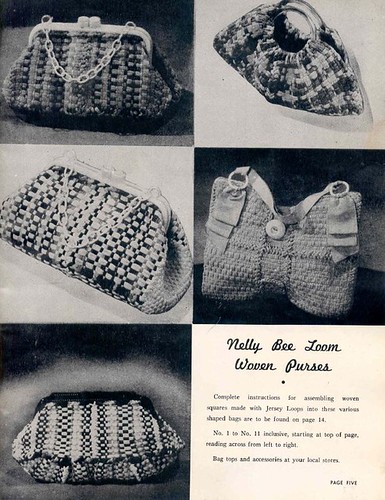
Vintage woven bags
Bags made from handheld loom squares

Weaving designs are posted on my Woof Nanny blog.

These are from vintage craft booklet, The Nelly Bee Loom Weaving Designs, 1945.
Who knew?!

Labels: ,

Wednesday, June 18, 2008

T-Shirt Scrap Bag


t shirt scrap bag
Originally uploaded by inventacharm
(click on image to see detail)


t shirt scrap bag
Originally uploaded by inventacharm


How To: (by Inventacharm)
1.gather lots of different old t shirts or t shirt material.

2.first cut two big pieces for the front and back, regular tote size. (btw i didn't line the bag so i only used these pieces for the bag)

3.cut a bunch of stripes from all the different material. same width as the two main pieces. length depends on how long you want the fringe to be. mine were about 4-5in.

4. starting from the bottom sew stripes of fabric to big bag square piece. as you go make sure they overlap. repeat with other bag square.

5.sew the two main pieces facing the wrong side (what will be your inner bag) leaving top side open. make sure you tuck in any piece of stripe fabric peekin from underneath before you do this.

6.turn bag inside out.

7.cut all stripes to make fringes

8.make strap for bag. sew to the sides of the bag. (just like any other bag really)

**to make flower/puff ball/whatever you wanna call it

all i did was make a bunch of little stripes of different color t material and glued it on corner of the bag . keep gluing the stripes in different angles on top of each other until it looks like above. i used a glue gun for this.

it looks kind of funky and messy in the end but i guess that's what i like about it.

Labels: ,

Sunday, June 15, 2008

Flashbags

Off theme, but I discovered this company called Flashbags (wearable art handbags) that I think deserves a plug.

They can take your OWN photo images (how fun it that?!) and craft a tote from it,
or you can choose one of the designs they have available, such as this sea turtle by Don King


They also have famous art works from museums, and are partnered with several non-profit organizations if you want to work with them for a fund raiser.

Read more here, from a feature story published in the summer issue of Vermont Life Magazine.

Labels: ,

Saturday, June 7, 2008

Details

Since t-shirt fabric is knit, that stretch can be challenging to work with.
There's no reason, however, it can't be stabilized with interfacing and used like a woven.
Saltygal has a great example of applique on a tote.

Something like this would be a fun way to focus on some of the great images on tees.

Consider collage also.
Patchwork.
Embellishment with embroidery.
Pleating.
Any other ideas??? Go for it!

Labels:

Friday, June 6, 2008

Tutorial for a T-shirt bag

Thanks to a suggestion from Meggiecat, I was able to retrieve this tutorial that I thought was deleted.

I like this bag by Craft_Wiki because it's a bit larger, with a flat bottom.
Check out how the neck opening is now the top opening for the bag.


This tutorial appeared on Craftacular in January 2007:

I made this bag out of some free t-shirts that were being handed out at a convention I attended. It's a nice size tote that is perfect for holding my knitting. I didn't line or interface my bag, so I'm careful not to load it up with heavy things.

This is more of a step-by-step of how I did it, rather than how to make your own. I just made it up as I went along.

Materials:
2- Tshirts (you could probably get by with just one, if you wanted) The size of the shirts depends on the size of the purse you want. Look at the neckhole to get a rough idea of the final size
Normal sewing supplies

Optional:
Interfacing
Lining fabric

I didn't line my bag, but I imagine you can figure out how to do it. Cut every t-shirt piece in the lining fabric and use the interfacing to stablize it.

Instructions:

1. Cut the t-shirt into a trapezoid around the neckhole. The neck won't be exactly on top, but rather pointing a little bit toward the front. The picture shows what it looks like when you unfold it.


2. Use the trapezoid to measure the size of the side pieces. I cut them wider on the bottom with a rounded top. I cut this from the second shirt.

3. Pin on the sides, and sew them to the front/back piece.


4. Measure the size of the rectangle for the bottom of the bag, and cut it from the left overs of the first t-shirt.

5. Pin and sew in the bottom.


6. Flip the bag right side out.

7. Cut off the bottom (the seam) of the second shirt. Then cut a strip about four inches wide.

8. Sew it along the side to make the handle. Turn it right side out.

9. Tuck the ends of the handle back inside (this will hide the edges), and sew the handles to the back of the bag (the shoulder blades, if you will). Make sure you stitch this well.

That's pretty much it. Not the clearest instructions, but that is more or less what I did.

Labels: ,

Thursday, June 5, 2008

More ideas

Wow, there are a lot of fun ideas out there!
When you find an online tutorial you like, be sure to copy it right away.
Sadly, so many sites disappear quickly.
I had several links saved that I was going to share with you, but they are no longer valid. Bumer.

This bag is so nicely done (by Ms. Ellemvee).
The yellow portion was a Blondie T-shirt.
This recently sold in in Ellemvee's Etsy Shop.


I can't get the photo to load, but check out the
Tropical tote by CarrieMe.

Here's an awesome video tutorial by Cara Hall, on how to make a rag rug.
I'm thinking you could make small panels and stitch them together into a tote???

Labels:

Wednesday, June 4, 2008

Book inspiration

You can find inspiration in some DIY-style books.
This cute "Rock the Tote" is from Generation T: 108 Ways to Transform a T-shirt, by Megan Nicolay.

Also this hobo they call "Bag Lady", made from two tees.


Make simple bags, shown in Sew Subversive: Down & Dirty DIY for the Fabulous Fashionista, by Stitch Lounge (Melissa Rannels, Melissa Alvarado, Hope Meng).

Labels: